Facial Recognition with Python
Machine learning - one of the most common buzzword in tech nowadays, is surely going to make our life simpler and easier in future. With increasing applications of face recognition, a popular sub-domain of computer vision, the technological world is getting more secure. A facial recognition system is a technology capable of identifying or verifying a person from a digital image or a video frame from a video source. The usage of face-recognition is going to increase rapidly with time and many tech giants like Facebook and Apple are already using it. In this context,a workshop called “Machine Learning using Python-Concept of Facial recognition” was conducted by GLUG MVIT on 13th March 2019 for the students of second and third year. This was an amazing way of getting the students understand the basics of Face recognition.
The following topics were covered
- Understanding how Face Recognition works
- Case study-The example which was implemented
- Implementation in Python
- Understanding the Python code
- Applications of Facial Recognition Algorithms
- Advantages and Disadvantages of Facial recognition
To understand the concepts taught you can go through the following. But before jumping to learn these, you need to have the following installed:
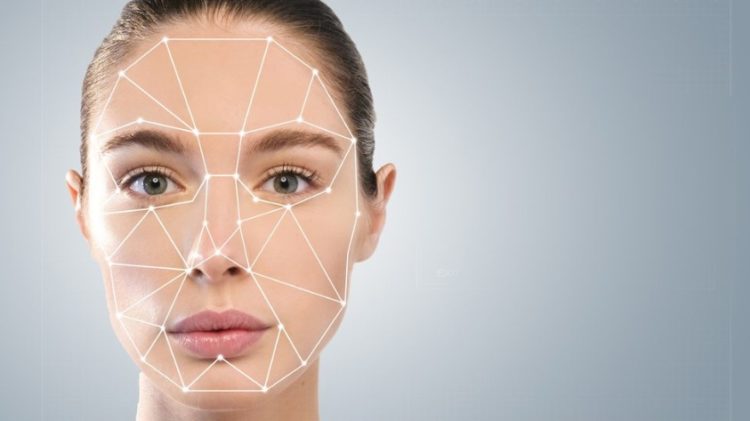
Working of Facial Recognition

-
Concept of feature vector: Every Machine Learning algorithm takes a dataset as input and learns from this data.The algorithm goes through the data and identifies patterns in the data.The challenging part is to convert a particular face into numbers – Machine Learning algorithms only understand numbers.
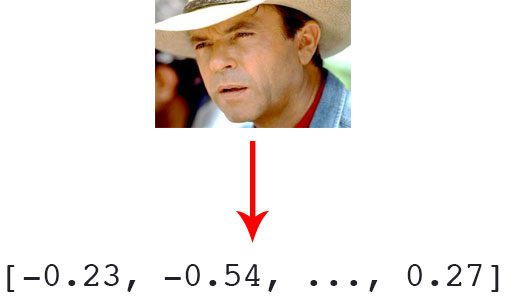
This numerical representation of a “face” (or an element in the training set) is termed as a feature vector. A feature vector comprises of various numbers in a specific order. - You can take various attributes to define a face like:
- Height/width of face (cm)
- Color of face (R,G,B)
- Height/width of parts of face like nose & lips (cm)
- We can consider the ratios as feature vector after rescaling
- A feature vector can be created by organising these attributes to into a table, say, for a certain set of values of attributes your table may look like this:
| Height of face (cm) | Width of face (cm) | Average color of face(R,G,B) | Width of lips (cm) | Height of nose(cm) |
|---|---|---|---|---|
| 23.1 | 15.8 | (255, 224, 189) | 5.2 | 4.4 |
Our image now becomes a vector that could be represented as [23.1, 15.8, 255, 224, 189, 5.2, 4.4]. You can add a number of other features like hair color & spectacles. Keep in mind that a simple model gives the best result. Adding more number of features may not give accurate results (See overfitting and underfitting).
Machine learning helps you with two main things:
- Deriving the feature vector: As it is a difficult process to involve all features by name,we convert it to feature vector.This is then used by the algorithm.A Machine Learning algorithm can intelligently label out many of such features.
- Matching algorithms: Once the feature vectors have been obtained, a Machine Learning algorithm needs to match a new image with the set of feature vectors present in the corpus.
A simple example
- In this case, you can implement facial recognition by matching an image with a new face with the existing images which are there in our data. For this, take up a bunch of pictures as the existing data set and send a new image as the input to the algorithm.
- The output is known here. You know that, if any of the images will match, a message saying “matched” should be displayed. You can also display the name of the person along with this message.
- There is an amazingly simple Python library that encapsulates all of what is learnt above – creating feature vectors out of faces and knowing how to differentiate across faces. This Python library is called as
face_recognitionand deep within, it employsdlib– a modern C++ toolkit that contains several machine learning algorithms that help in writing sophisticated C++ based applications. The model here is built using dlib’s state-of-the-art face recognition built with deep learning. The model has an accuracy of 99.38% on the Labeled Faces in the Wild benchmark. This model can:- Find faces in pictures
- Find and manipulate facial features in pictures
- Identify faces in pictures
- Perform real time face-recognition
Here, faces in pictures will be identified.
Implementation in Python
The code can be studied thoroughly. Just try to understand the code and go through the folder structure. You can run it in your own system. This would help you understand better. The sections of the code can be referred and the explanation for each block of code is given in the next section.
   # import the libraries
import os
import face_recognition

# make a list of all the available images
images = os.listdir('images')

# load your image
image_to_be_matched = face_recognition.load_image_file('my_image.jpeg')

# encoded the loaded image into a feature vector
image_to_be_matched_encoded = face_recognition.face_encodings(
    image_to_be_matched)[0]

# iterate over each image
for image in images:
    # load the image
    current_image = face_recognition.load_image_file("images/" + image)
    # encode the loaded image into a feature vector
    current_image_encoded = face_recognition.face_encodings(current_image)[0]
    # match your image with the image and check if it matches
    result = face_recognition.compare_faces(
        [image_to_be_matched_encoded], current_image_encoded)
    # check if it was a match
    if result[0] == True:
        print("Matched: " + image)
    else:
        print("Not matched: " + image)
Understanding the code
You need to follow the blocks of code in order to understand the explanation given below. Also,the places where “lines of code” phrase is used, includes the lines which have comments.
- The first three lines of code show the various libraries which are imported for the purpose. The os library is for getting the images in data set and the face_recognition library is used to implement the algorithm.
# import the libraries
import os
import face_recognition
- The next two lines give the path of all images present in the images directory. After writing these lines, an array “images” is formed containing all the images which are present in the images directory. The listdir() method of the os library is used for this purpose.
# make a list of all the available images
images = os.listdir('images')
- The image which is to be matched is loaded in the following two lines. The load_image_file() method does this. The parameter is usually the name or path of the input image.
# load your image
image_to_be_matched = face_recognition.load_image_file('my_image.jpeg')
- The next three lines of code tell you how to encode these images into a feature vector. For this, a face_recognition method called face_encodings() is used. The parameters for this can be RGB values or numbers to specify the attributes which make up the feature vector.
# encoded the loaded image into a feature vector
image_to_be_matched_encoded = face_recognition.face_encodings(
    image_to_be_matched)[0]
- The rest of the lines of code navigate through all the images and check each image of the data set with the input image with every iteration if the for loop. A method compare_faces() is used for this. The if condition is used to display the message “matched” or “not matched” along with the name of the image.
# iterate over each image
for image in images:
    # load the image
    current_image = face_recognition.load_image_file("images/" + image)
    # encode the loaded image into a feature vector
    current_image_encoded = face_recognition.face_encodings(current_image)[0]
    # match your image with the image and check if it matches
    result = face_recognition.compare_faces(
        [image_to_be_matched_encoded], current_image_encoded)
    # check if it was a match
    if result[0] == True:
        print("Matched: " + image)
    else:
        print("Not matched: " + image)
Great! You can now design your own models taking various sets of data. There are a various other methods inside the face_recognition library which can be used for various purposes.
The output for the above code is as follows :

Overfitting and Underfitting
In statistics, goodness of fit refers to how closely a model’s predicted values match the observed (true) values. We can understand overfitting better by looking at the opposite problem: underfitting.
Underfitting occurs when a model is too simple – informed by too few features or regularized too much – which makes it inflexible in learning from the dataset.
In statistics, overfitting is “the production of an analysis that corresponds too closely or exactly to a particular set of data, and may therefore fail to fit additional data or predict future observations reliably”. An overfitted model is a statistical model that contains more parameters than can be justified by the data.
A key challenge with overfitting, and with machine learning in general, is that we can’t know how well our model will perform on new data until we actually test it. To address this, we can split our initial dataset into separate training and test subsets.

This method can estimate how well our model will perform on new data. If our model does much better on the training set than on the test set, then we’re likely overfitting. Here are a few of the most popular solutions for overfitting:
- Cross-validation
- Train with more data
- Remove features
- Early stopping
- Regularisation
- Ensembling
Applications of Facial Recognition systems
-
Social media: Social media platforms have adopted facial recognition capabilities to diversify their functionalities in order to attract a wider user base amidst stiff competition from different applications.
-
ID Verification Solutions: Emerging use of Facial recognition is in use of ID verification services. Many companies are working in the market now to provide these services to banks, ICOs, and other e-businesses.
-
Face ID(by Apple): Face ID has a facial recognition sensor that consists of two parts: a “Romeo” module that projects more than 30,000 infrared dots onto the user’s face, and a “Juliet” module that reads the pattern. The technology learns from changes in a user’s appearance, and therefore works with hats, scarves, glasses, and many sunglasses, beard and makeup.
-
Security Purposes: A criminal in China was caught because a Face Recognition system in a mall detected his face and raised an alarm. Clearly, Face Recognition can be used to mitigate crime. Police forces in the United Kingdom have been trialling live facial recognition technology at public events since 2015. In recent years Maryland has used face recognition by comparing people’s faces to their driver’s license photos.
Advantages and Disadvantages
- Advantages
- Improvement of security level
- High accuracy
- Fully automated
- Disadvantages
- Processing and Storage of data
- Image quality needs to be sharp and clear
- Doesn’t perform well with unexpected angle of picture or camera
The code for this tutorial is available here.